论文复现
TS-CAM
Debug
os.path.join造成的linux和window路径的区别
1 | # original:路径的分隔符不正确,导致路径不对 |
KeyError: ‘_ _ getstate _ _’
由num_workers引起, 多线程执行时出现错误,具体原因不清楚,这次的解决方法是将多线程语句(torch.nn.DataParallel)删去,并将num_workers改为0.查看自己电脑线程数的方法:
1.WIN+R
2.输入wmic回车
3.输入cpu get numberOfLogicalProcessors回车
RuntimeError: CUDA out of memory.
减小batch_size或图像大小,一开始在default文件中更改,没有效果,依然报错,后来发现default文件中是在config的yaml文件之前设置的,还需要更改config文件中的设置
代码分析
train_cam
parameters&work_dir:
—config_file ./configs/CUB/deit_tscam_tiny_patch16_224.yaml —lr 5e-5 MODEL.CAM_THR 0.1
运行位置应该在主目录,因为没有直接使用bash运行shell文件
利用python的注册器创建模型(deit.py®istry.py)
superpixel-fcn
Debug
scipy版本造成的问题
1 | # from scipy.ndimage import imread |
cudnn.benchmark
代码分析
run_demo.py
使用的网格大小是16x16,输入图像为224x224时,生成14x14个网格
SpixelNet
1 | def forward(self, x): |
main.py
输入图像尺寸为208*208,bs=4,label代表
1 | # label [4,1,208,208] |
loss.py

1 | # 程序中使用的是compute_semantic_pos_loss,并未使用RGBXY |
AFA
将分布式训练改为单卡训练
1 | #183 dist.init_process_group(backend=args.backend,) |
utils中的imutils.py
1 | def tensorboard_label(labels=None): |
1 | def cams_to_affinity_label(cam_label, mask=None, ignore_index=255): |
1 | def get_aff_loss(inputs, targets): |
PAR实现
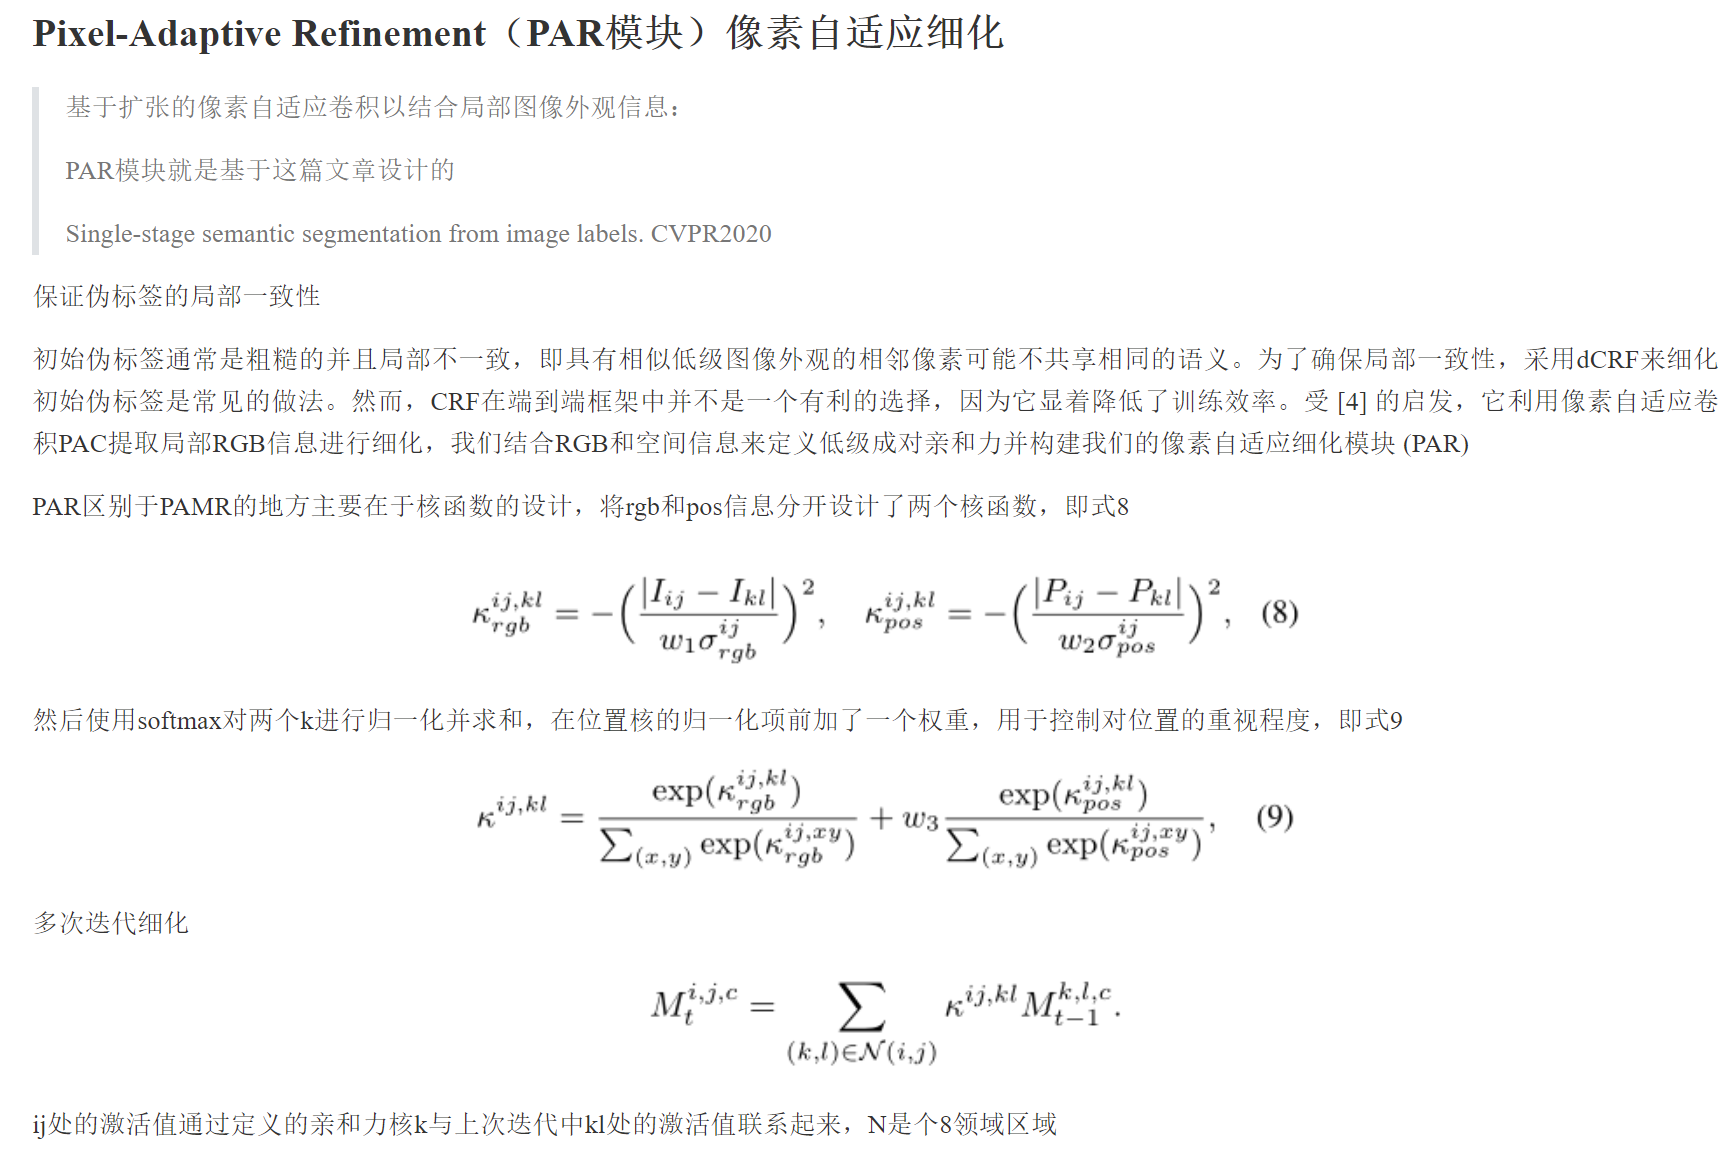
1 | ### |
TransFG
apex安装
1 | $ git clone https://github.com/NVIDIA/apex |
路径报错
scipy的imread报错,替换为imageio.imread
内存占用很大,memery error
CutLER
需要手动将TokenCut代码放入third_party文件夹中